Hello creators! If you want to make a website without spending any money, then you are at the right place. Today I am going to tell you how to make a website on Google by using Google sites. Google Sites is a good place where you as a beginner can easily make a website. If you are the owner of a small business or a student or anyone else with a cool idea, then this whole detailed guide is for you.
Before you finish your cup of coffee, you will get complete information about how to make a website on Google.
Table of Contents
What is Google Sites?
You must know all these basic things before learning how to make a website on Google. Google Sites is a free website building tool provided by Google that allows users to create websites using a drag-and-drop interface. It integrates seamlessly with other Google services like Google Drive, Docs, Sheets, Forms, YouTube, and Calendar, making it perfect for creating collaborative and content-rich websites.
Why You Have to Learn How to Make a Website on Google?
Before knowing how, let us quickly cover why.
Google Sites is:
- Free: – You don’t need to buy hosting or domain name (you can add any domain name later).
- Easy to Use: – To create a website on Google sites, you do not need any coding or design skills.
- Integrated with Google Workspace: – You can embed Google Docs, Sheets, Forms, Slides, Maps, and more here.
- Collaborative: – You can work here in a group, just like Google Docs (If you want to get the design done from someone else, you can do that too).
Google Sites is great for people wanting to create portfolios, responses, event pages, internal company sites, and basic informational websites.
Let’s start how to make a website on Google Sites.
Step 1: Sign in to Google Sites
Many people search how to make a website on Google, but this post is perfect for you.
Start at the very beginning.
- Go to sites.google.com
- First check whether you are logged in with your Gmail account or not, if not then login with your Gmail account.
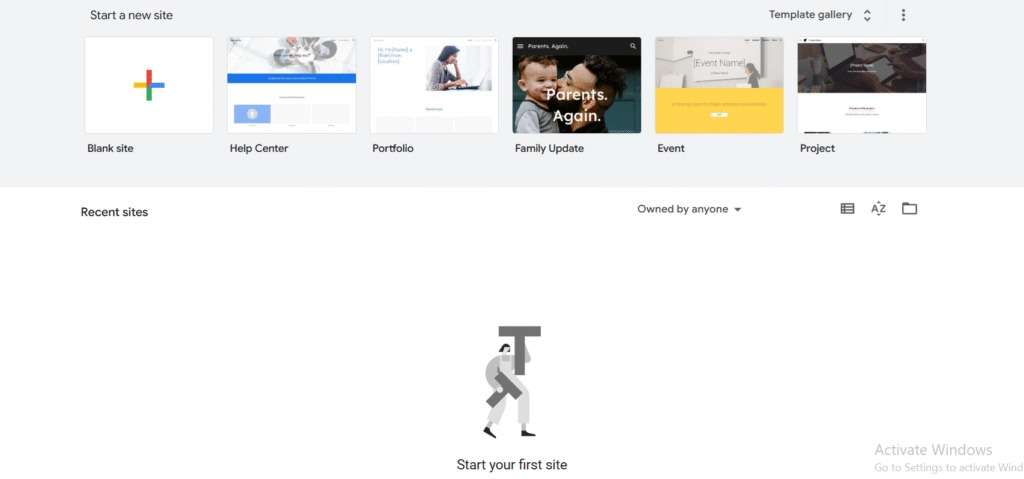
- Then you will see the dashboard with many options.
- Click on blank site with plus icon or you can also choose a pre-designed template.
Step 2: Set Up Your Homepage
When you open your blank site, you will see a super simple layout.
- There is a header section at the top.
- After that there is a main content area.
- There is a sidebar menu on the right side with a lot of options like insert text, images, content blocks and more.
Change the Site Name and Title
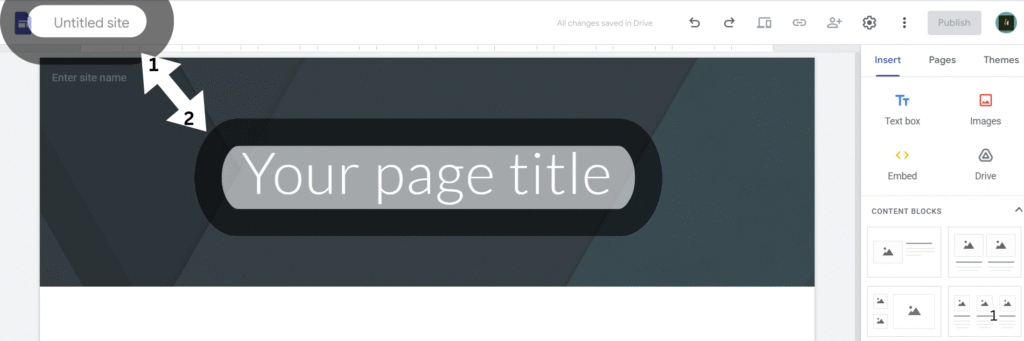
To name your website, click on “Untitled Site” above and edit the name, which will appear in your browser tab. marked in the image below.
Now you have to edit your header title like if you are creating a portfolio site then the header title should be “Welcome to my creative world” marked in the image below.
You can also change the header type from Cover, Large Banner, Banner, or Title Only.
Step 3: Add Pages to Your Site
Most websites have more pages than just the homepage, so let’s add some pages
- Click on the pages tab from the right panel.
- Click the + icon at the bottom to add a new page.
The pages that should be on your website are:
- About Me – To write about you and your story.
- Portfolio – Write about what you do.
- Blog – To post updates or articles.
- Contact – To add a contact form and contact information.
Once you add all the pages, Google Sites will add your pages to the navigation menu
Step 4: Customize with Content
Now go back to the insert tab and see what you can add:
- Text Boxes – To add titles, paragraphs, or quotes.
- Images – To add images, upload or search via Google.
- Content blocks – It has some pre-designed templates for your content which can save some working time for you.
- Buttons – To add action buttons like “Buy Now” or “Read More”.
- YouTube Videos – You can embed your videos from your channel.
- Drive Files – To insert Google Docs, Sheets, Slides, or Forms.
- Map – You can embed google map with your exact location. (You should add map on your Contact Page).
Pro Tip: Use columns to organize your layout. For example, one column can be text and the other an image. It looks stunning and professional!
Step 5: Design Your Site’s Look
Just learning how to make a website on Google will not work, you also need to design a website well.
The kind of deep design customization that can be done on other platforms like WordPress, Wix, etc. is not offered by Google sites but you still you get some design tools like:
- Themes: Click on the “Themes” tab to choose a color scheme, font style and layout styles. Keep it clean and consistent.
- Header Image: Customize your header image to match your brand or vibe. You can upload your own or use Google’s free library.
- Logo: You can add your brand’s logo, which appears in the top left of your site.
Step 6: Add Navigation and Links
Navigation makes your website user friendly.
- The default is top navigation, which is best for most websites.
- You can change it to side navigation which will feel like Manu, which is best for portfolio and documentation sites.
To link a document with some text or button, or to do internal or external linking:
- Highlight text or select a button.
- Click the insert link icon.
- Paste your URL and done.
You can also create anchor links for one-page websites by linking to specific sections.
Step 7: Mobile Preview
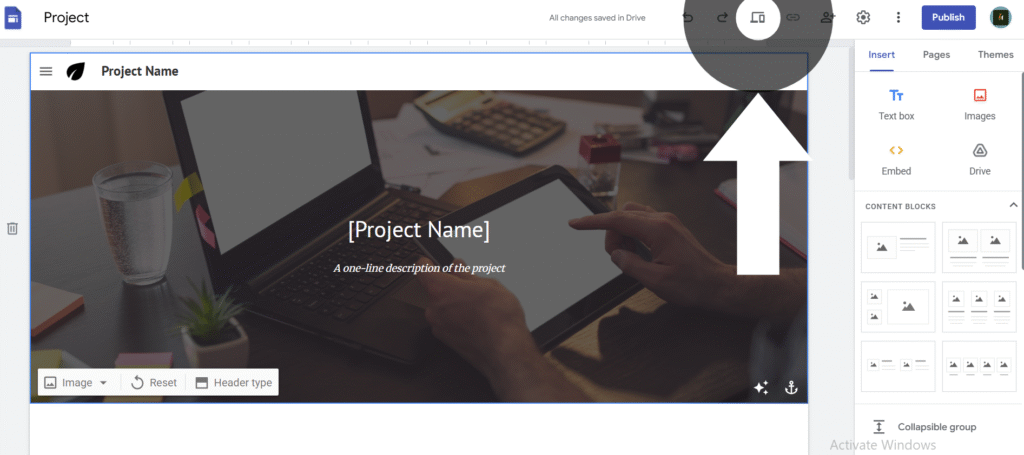
After completing all the tasks, you can check how your page will look on the visitors browser by clicking on the preview icon in the top bar.
- Toggle between desktop, tablet, and phone view.
- Make sure your content is easy to read and well formatted for mobile users (about 60% of web traffic is coming from mobile users).
Step 8: Publish Your Site
If you are satisfied with your site, then now is the time to take your site live.
- Click the “Publish” button on the top right.
- Choose your web address, this will be in the format like:
https://sites.google.com/view/your-site-name - You can keep your site restrict to specific people (best for internal or private site) or you can keep it public.
- Click “Publish” again to confirm.
Boom! Your website is live on the internet.
Optional: Connect a Custom Domain
If you want a professional domain like www.yoursitename.com you can buy it from Google Domains or from another domain registrar and connect it to your site. (recommended: buy domain from Google Domains for easy setup)
To connect domain:
- Click the Settings icon in the top menu.
- Go to Custom Domains then click connect domain.
- Follow the prompts to connect your domain.
It’s a few extra steps, but totally worth it if you want to look polished and credible.
Step 9: Update and Maintain
One of the most special things about Google Sites is that you can edit or update your site anytime after it is published without losing any existing content.
Just:
- Login to Google Sites
- Edit your content
- Click “Publish” again to make your changes live.
When you learning how to make a website on google, you should have know how to update and maintain your site.
Keep your site fresh with updates, new projects, blog posts, or event announcements.
Pro Tips Before You Go
- Use Google Forms to create a contact form.
- Embed Calendars for appointments or event schedules.
- Back up your content by linking your site with your Google Drive.
- Collaborate with team members for group projects or company pages.
- Check your analytics if connected to a domain and Google Analytics.
Final Thoughts about How to Make a Website on Google
And that’s it! Now you know how to make a website on Google using Google Sites – that too for free and without any coding. It may be a school project, instruction page or digital resume, this tool can help you get started fast.
If this guide helped you, be sure to share it with a friend, and don’t forget to drop a comment below if you have any questions. I’m here to help.
If you have created a cool website using Google Sites then don’t forget to add the link below, I would love to check it out. Until next time,
Stay creative, stay curious, and keep building!